How much would you charge for a solid walnut dining table like this? My estimate is about $10,000. I only charged my friends $2,500. That sounds like bad business, but there’s a reason I can make it work.
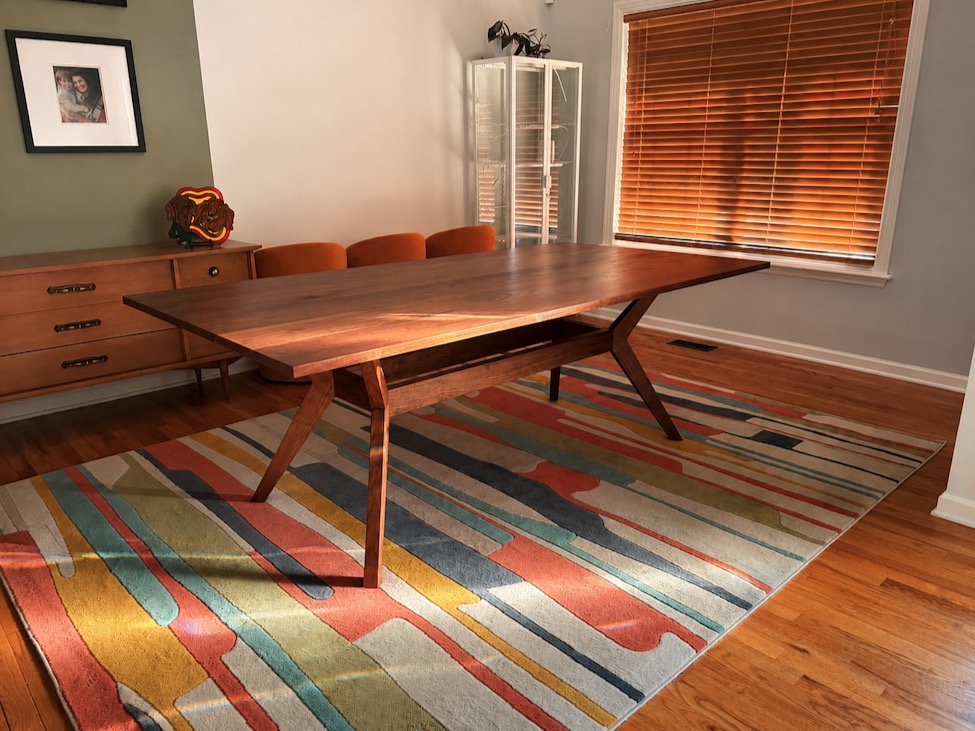
Where Does $10,000 Come From?
Walnut is expensive right now. Here in the St. Louis area, good 8/4 walnut can run as much as $15 per board foot. The lumber for this table alone came to roughly $2,500. And you have to factor in the time investment. Between designing, prototyping, milling, building, sanding, finishing, and delivery, I estimate I have about 125 hours in the table.
Subtract $2,500 in materials from a $10,000 selling price and that leaves $7,500, or about $60 an hour before overhead, taxes, tools, insurance, and all the other costs of running a business. At a much more reasonable shop rate of $125 an hour, this table would be closer to $18,000.
That’s one of the many reasons I have a lot of respect for career custom furniture makers. Making one-off furniture for a living isn’t easy. Fortunately, I make my living teaching woodworking. My friends could cover the materials while I turned the project into videos and a full woodworking course. If you want step-by-step build videos, plans, templates, a SketchUp file, and a cut list for this Splayed Leg Mid Century Modern Table, check out my course in The Wood Whisperer Guild.
Designing the Base
My friends gave me a simple brief: walnut, angled legs, and a mid-century modern feel. The rest was up to me. I started with a rough SketchUp model, then worked out the important dimensions and angles full-size on paper. I go deeper into that process here: This Old-School Drawing Method Can Save Your Build
In SketchUp, I realized there was a problem I needed to design around. The legs splay outward at 45 degrees, so the legs and long rails meet at 22.5-degree bevels. That geometry left extra material sticking out from the rail. Rather than bevel the entire rail, I made a full-size prototype and found a better solution: cut deeper into the leg and create a tapered bevel that fades away. A geometry problem turned into one of my favorite details on the table.
Building the Base
Each leg is made from two pieces joined with six 3/8-inch dowels. I used epoxy for the extra working time, which turned out to be useful when I discovered my first set of dowel holes wasn’t deep enough. The legs also required mirrored 22.5-degree cuts, so I made a double-ended table saw sled. Two legs register from one side and two from the other, while the blade and fence stay in the same position.
I planned to use dowels for the long rail joinery too, but my jig didn’t register well on the angled surface. So I switched to Dominos. Once you leave the world of straight and square, you start finding the limits of your favorite joinery systems pretty quickly.
Clamping Odd Angles
The legs also required some unusual clamping. I used sandpaper-lined cauls that give the clamps a square surface to push against while directing pressure into the angled joint. If you haven’t made a set, I show the idea here: Cool Miter Clamping Trick – You’ll Want to Make This!
Even with all that planning, the final glue-up went sideways. The double-stick tape holding the cauls let go, then some support blocks popped off. Eventually I abandoned the elegant plan and put clamps wherever they would close the joint. It wasn’t pretty, but it worked.
Building the Walnut Top
Board selection really matters on a top this large. After milling the lumber, two boards stood out for the wrong reasons, so I went back for replacements. I hated spending more money on walnut, but this table should last for generations. I glued the top with Titebond Dark and used Dominos for alignment. Looking for a TWW Glue Roller? Once it was cleaned up, I added a large under-bevel around the perimeter. That keeps the strength of a thick top while making it look much lighter.
Finishing and Protection
The main finish is Natura OneCoat. My friends wanted the low-luster look of a hardwax oil and liked the fact that it can be repaired. After that cured, I added Carbon Method Ceramic Nanofinish for another layer of protection. It goes over an existing cured finish and adds a very thin wear layer without making the surface look like it’s coated in plastic.
- Carbon Method Ceramic Nanofinish (Use code SpagCoat for 10% off)
- Bench Nuts (Use code SpagCoat for 10% off)
Delivery Day
The top and base required separate trips, but once everything was assembled in the house, the project finally came together. My friends got a beautiful solid walnut dining table that should serve their family for decades. I got to tackle one of the more complicated table designs I’ve built and turn the process into a teaching project. Everyone wins.