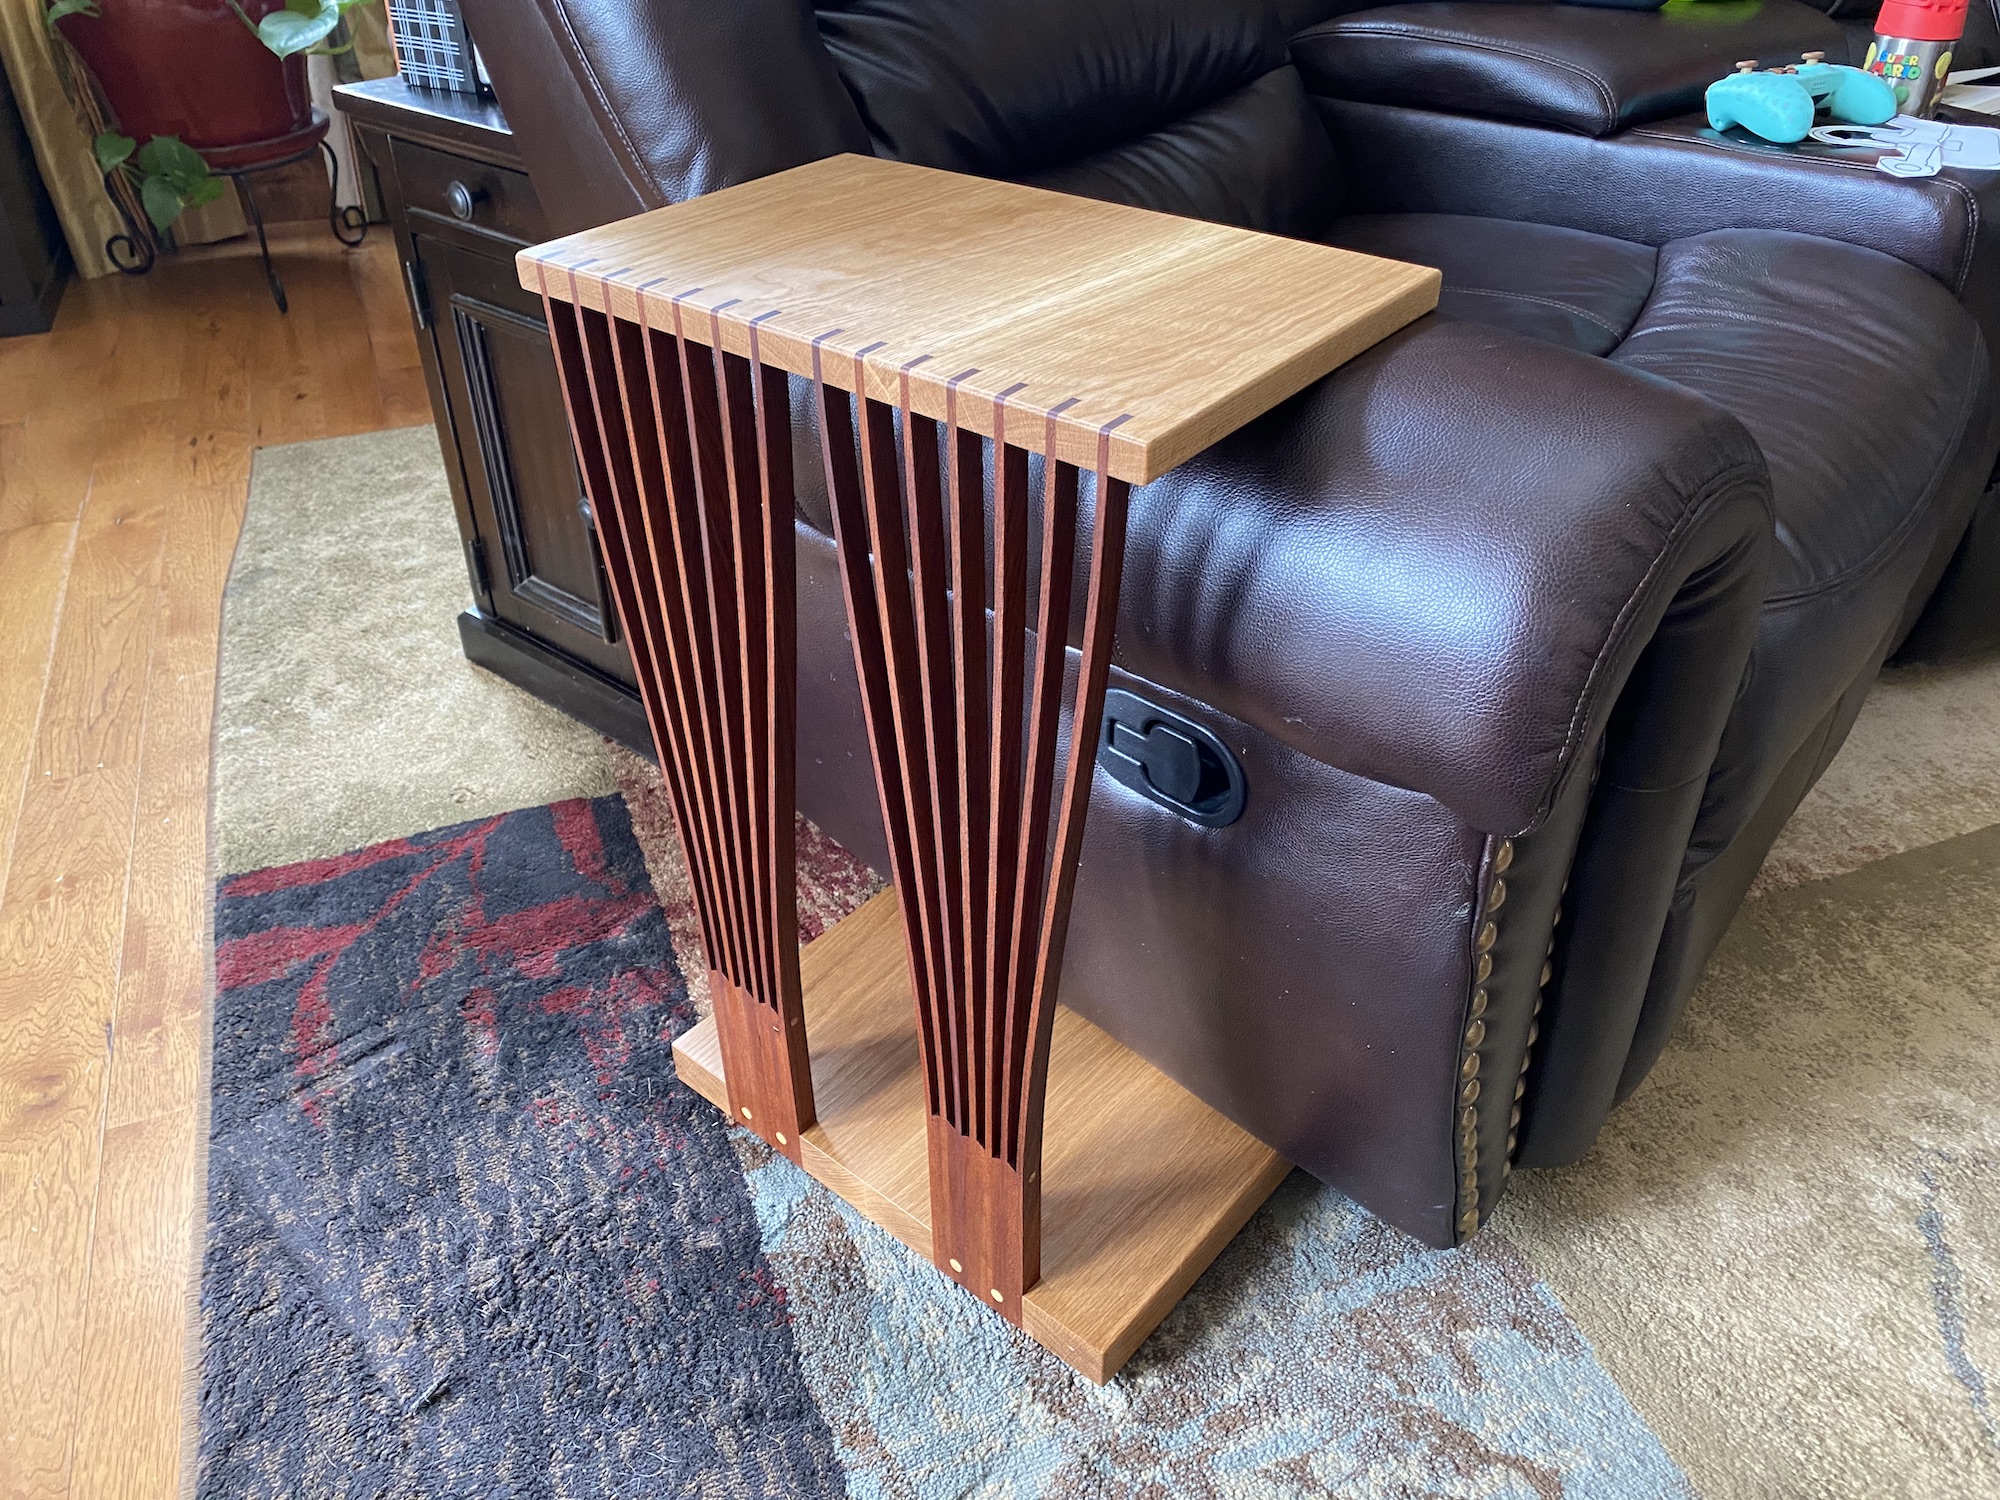
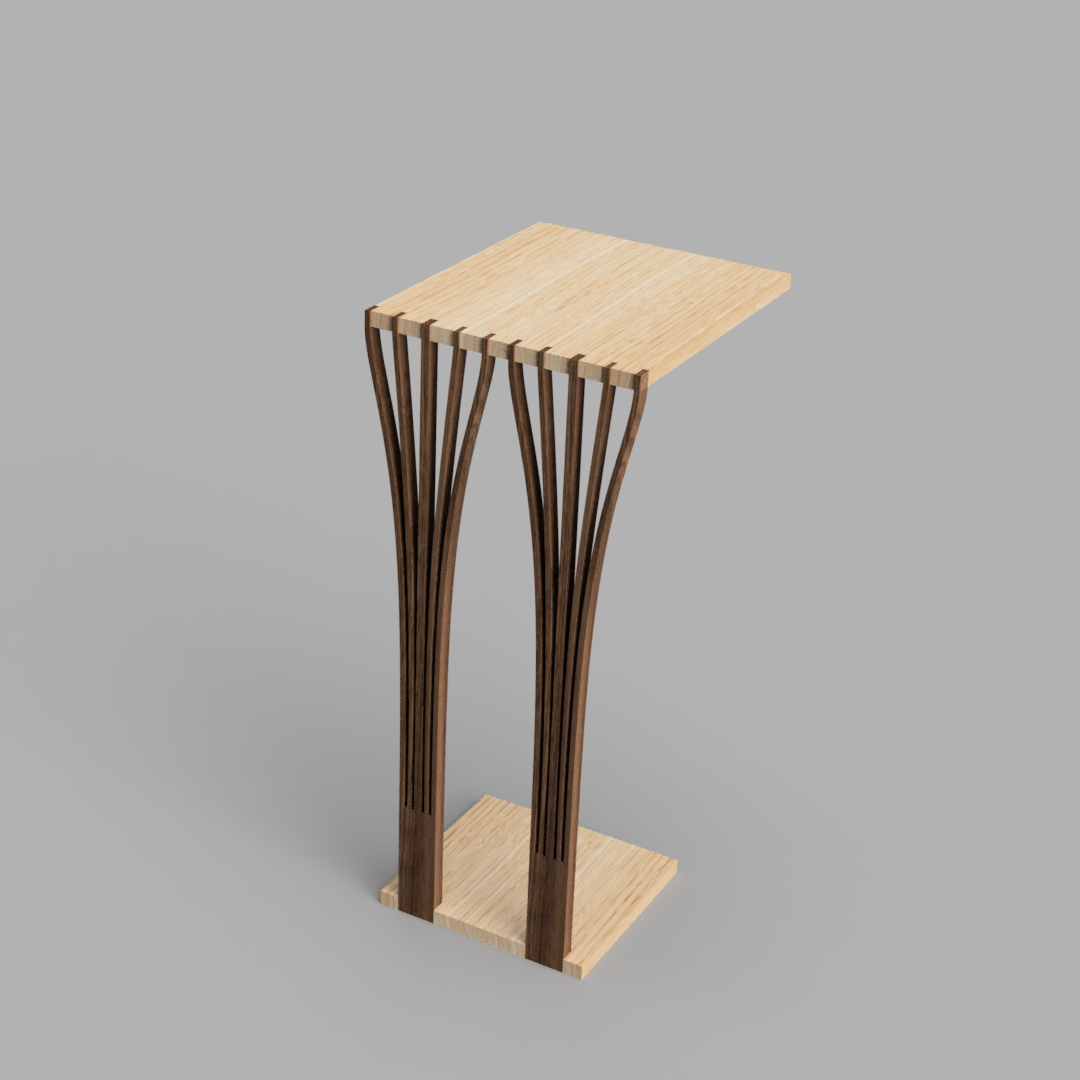
A fun design experiment involving bent wood strips.
My new shop assistant Jon likes to dabble in design. He posted a cool little table idea to his Instagram feed and I thought it would make a fun experiment for TWW. We put our heads together and came up with a prototype. As you probably know by now, even prototypes can be beautiful and functional so Jon took the table home and put it to work. After that first proof of concept, I really wanted to take a second crack at the design with a few changes that put a slight Spag-spin on it and you’ll see that one at the end of the video.
If you try to build one of these, there are a couple of things we learned that I’d like to share with you.
It turned out to be a lot easier to bend the strips than I anticipated and you saw that we removed the strip bundle from the holding jig. So there’s really no need for that holding jig. The strip bundle can simply be glued together on its own and the strips can be hammered into the slots during the glueup. The additional benefit here is that the glue joints aren’t stressed until well after the glue cures.
We added dowels to reinforce the bundle of strips. Be sure to do this BEFORE you attach the bundles to the top.
Sand your strips with a hard sanding block before assembly, or use a hand plane. If you have any mill marks on those surfaces, you don’t want to have to sand them away after the fans are glued up. But don’t use a power sander. A hard sanding block will maintain flatness.
Really like this design and I think I will build from some leftover cherry and maple with a natural finish. Enjoyed the video build and your thought process which identified some pit falls for me to avoid.Thanks guys.Rick
C
Chris Williams
on 12/11/2020 at 11:27 AM
Nice project! I think I will “build upon” your ideas for a Christmas craft. I wonder if maybe Jon’s table is a little stiffer is because it is shorter than Marc’s table? Thanks for the cool ideas guys!
J
Jacques Allard
on 12/21/2020 at 12:00 PM
Wondering what you used for finish. A stain or oil
Marc Spagnuolo
on 12/21/2020 at 12:07 PM
We used Tried & True (polymerized linseed oil) with some wax added.
J
Joel Swartz
on 12/24/2020 at 02:14 PM
Great instuction and explaination, thanks. I will give it a try as a winter project.
T
Tim Harrelson
on 12/31/2020 at 10:03 AM
Marc… this comment is on the video where you guys built the side table. Thank you so much for the example of building on the work of others because I’m exactly like you… If you put a blank sheet of paper in front of me, I don’t have much to offer but through the years I have referred to myself as “an improver”. It’s the same concept… Give me a starting point and often, I can build it and even improve on it. Thank you for being transparent!Tim Harrelson
R
Roy Telling
on 01/28/2021 at 12:09 PM
Like the table but unfortunately I can’t use your SketchUp file as I use 2017 version and I don’t want to upgrade to the newest one because 2017 you can use offline.How can I send you a “2017” ShetchUp file??? I thought of other ways this might look nice
Marc Spagnuolo
on 01/29/2021 at 12:07 PM
You can use the online version of sketchup to down-convert any sketchup file to any version of sketchup you want. :) But I do believe we received your file. I’ll take a look.
G
Goody Cloise
on 03/05/2025 at 02:32 PM
Your post-build tips state that the holding jig isn’t necessary for the strip glue-up. One advantage I see with the jig is that–if the depth of the jig slots is uniform, and especially if that depth matches the thickness of the tabletop–the tops of the glued-up strips will be at the correct length when it comes time to glue the tabletop to the strips. If one were to forgo the jig, would one then trim the strips flush to the top face of the table after the tabletop has been glued to the strips? And wouldn’t the jig make it easier to ensure both sets of strips are the same length? One more question: When gluing a strip bundle, was it difficult to keep the bundle correctly oriented to the jig? In order for a given bundle to oriented correctly after final glue-up, its center strip needs to be perpendicular to the tabletop (and thus to the jig, if a jig is used). With the slipperiness of all that glue, I could see a bundle getting off kilter as a clamp is applied.
G
Goody Cloise
on 07/23/2025 at 03:31 PM
Y’all can ignore my questions above. I figured out what I needed. I used this design as the basis for an end table: Instead of two fan legs on one side, I shortened the top and base, and positioned one leg on each side (opposite each other), centered from front-to-back. So it’s more like a regular end table than one that can slide under a chair/sofa. I used the “Marc” version of the fans, and used 1/4″ slats/spacers, which resulted in no fan flexing whatsoever. Walnut for the top and base, cherry for the fan legs. I am very pleased with the way it turned out (on my third try–d’oh!)


