
You spent hours building something beautiful. The joinery is tight, the surfaces are smooth, and you’re finally ready to bring the piece to life by applying a clear coat or stain.
At first, everything seems great. But within seconds, you begin to notice dark patches appearing across the surface like a bad rash (it’s poison ivy season so I know what I’m talking about). Some sections are light and vibrant, and others are dark and muddy. What’s going on?! Well, congratulations. You’ve met blotching (aka splotching).
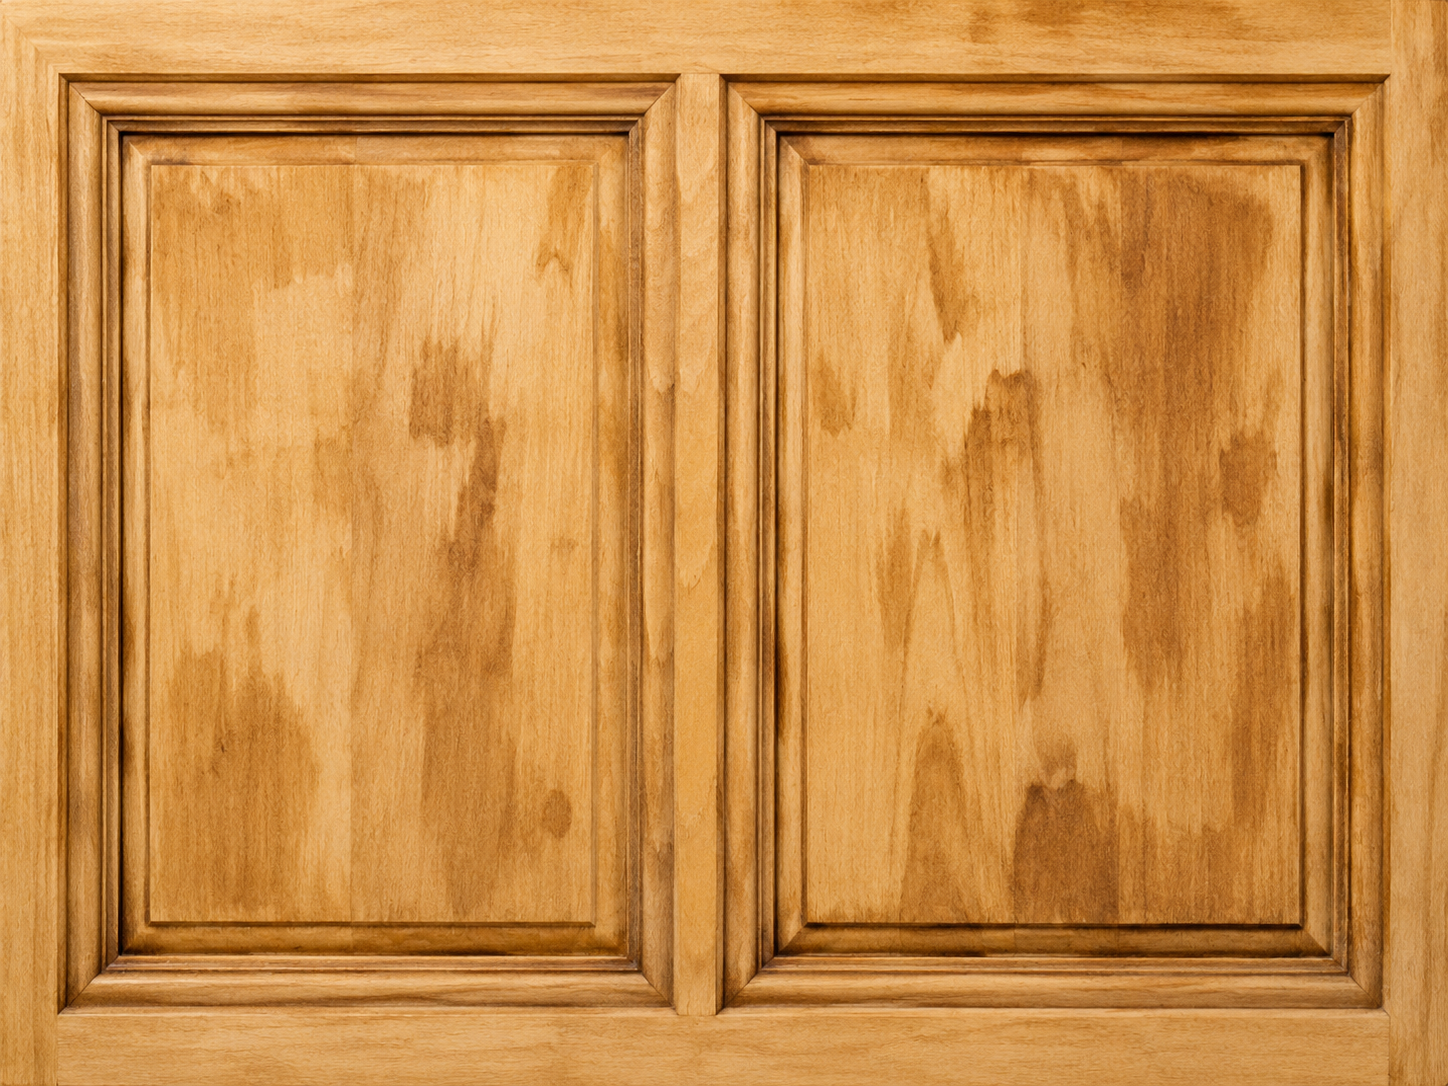
It happens to just about every woodworker at some point, especially when working with species like cherry, pine, birch, alder, and maple. Fortunately, it isn’t random…it’s predictable. And it’s really not the fault of the finish. Once you understand what causes it, you can make some adjustments that limit the dreaded blotch and make your finishing process much more predictable. In this guide, I’m going to show you How to Prevent Wood Blotching When Staining or Finishing.
Why Wood Blotches in the First Place
The late and great Glen Huey once said, “Cherry blotches……get over it!” There’s a lot of wisdom in that. After all, blotching comes down to the natural properties of the wood and the fact that we’re doing something unnatural to it. So fighting blotch can sometimes be an exercise in futility. While I absolutely agree with the spirit of Glen’s advice, I also think a well-rounded woodworker should know how to produce all kinds of finish results regardless of the species, and that includes making blotch-prone woods look even and consistent.
Wood isn’t a manufactured sheet of perfectly uniform material. It comes from trees that were previously alive with complex biological systems that allowed the tree to survive and grow. What that means for us as woodworkers is that trees are inconsiderate jerks who refuse to organize their fibers according to our finishing schedules.
Even within a single board, you’ll find areas with different densities, grain orientations, and absorption rates. When you apply a finish or stain, the softer or more porous areas absorb more product and become darker. Denser areas absorb less and remain lighter.
Here are a few things that can make the problem worse:
The species
Some woods simply have a reputation for blotching. Cherry, pine, alder, birch, and soft maple are among the most common offenders. That doesn’t mean you should avoid them. It just means you need to plan your finishing strategy accordingly.
Exposed end grain
End grain is significantly more absorbent than face grain. It’s basically a bundle of tiny straws waiting to drink whatever you put on it. Without some preparation, exposed end grain will almost always finish darker than the surrounding surface. And areas of partial end grain such as edge profiles or raised panels can be particularly challenging.
Applying too much finish
Flooding the surface feels productive, and a lot of folks do it, but more finish isn’t necessarily better. On a blotch-prone wood, a heavy application gives the thirsty areas even more material to absorb, making the problem areas even worse.
Stains & Dyes
Stains and dyes contain color particles. So when it comes to uneven absorption, you can bet that stains and dyes will make the blotching even more noticeable than a clear finish. In fact, most woodworkers first experience blotching after applying stain to a blotch-prone wood species.
Prevention
Preventing blotch isn’t binary; it exists on a scale. There are things we can do to tone down blotching. There are things we can do to completely prevent blotching. And there are a lot of solutions or combinations of solutions that will get you somewhere between those two extremes. So here are five blotch control tips that will help you get the finish you’re after.
1: Sand Properly, and Higher
Surface preparation has a major effect on how evenly a wood absorbs finish and stain. Generally speaking, sanding to a higher grit tends to close the pores and decrease absorption. Sanding to a lower grit increases absorption. For most furniture projects, I’ll sand the face grain to 180 grit. That gives me a smooth surface without polishing the wood so much that the finish struggles to penetrate. If I’m using a blotch-prone wood, I’ll usually sand to a higher grit like 220 or 320 to help reduce the overall blotch. And if using a stain, consider the potential drawback of sanding to a higher grit is that the stain color will be less intense.
Because end grain absorbs so aggressively, sanding it to a higher grit can help it behave more like face grain. Try sanding your end grain to at least 320. And if you’re sanding raised panels, make sure you give the raised profile a little extra 320 grit love as that’s a spot that will look particularly bad if the color ends up inconsistent.
Sanding alone won’t totally prevent blotching but it can put you on the right path. Remember, it’s on a scale and sanding properly and selectively is where the process begins.
By the way, one of the best ways to sand complex profiles by hand is to use sheets of our Backside Sandpaper. It’s available all the way up to 400 grit and features sanding grit on both sides, giving you the grip you need to conform to various shapes. Highly recommended!
2: Inspect the Surface With Water
Before applying your finish, wipe the surface with water. This does two things. It will give you a preview of what the surface will look like with finish, making high absorption areas more obvious. This can help you decide if you need to take further blotch prevention steps or if you can proceed with your finish.
The water will also raise the grain. That means that once the water dries, you should feel a rough texture on the surface. While there are strategic reasons for doing this, especially if using water-based finishing products, there’s really no huge benefit for blotching. Except for the fact that it requires you to give the surface one final light sanding with your highest grit, making sure your surface is sanded as evenly as possible.
This process can also reveal glue spots and scratches, giving you one last opportunity to resolve them before finishing.
3: Consider a Thin Seal Coat
A thin coat of finish can often help reduce blotching. The key is to apply very little material so there’s no opportunity for heavy absorption. Once that coat dries, the wood fibers are sealed, or at least well on their way to being sealed. So when you proceed with additional coats, the overall absorption will be fairly light and the blotching should be reduced.
A classic sealer is dewaxed shellac. It dries quickly and is compatible with most topcoats. A light coat, often around a 1-pound cut or even lighter, partially seals the wood without building a heavy film. You can actually buy this stuff pre-mixed in the form of Zinsser Bullseye Seal Coat. Keep in mind, you’re not trying to encapsulate the wood in shellac. You’re simply reducing the difference between the most absorbent and least absorbent areas.
For more information on this process, check out this demonstration:
After applying the seal coat, let it dry and lightly scuff-sand the surface. Be careful around edges and corners because it’s very easy to sand through the shellac in those areas.
One thing to keep in mind is that while shellac can be incredibly effective at preventing blotch, it can also prevent your stain from absorbing. So the more the surface is sealed, the less intense your color will be. This is why test boards are absolutely essential.
4: Consider a Pre-Stain Conditioner
An alternative to a shellac seal coat is a purpose-made pre-stain conditioner. Most home centers sell this stuff in various forms as a universal cure for blotching. Unlike with shellac where we let the material cure before applying our finish or stain, these products are intended to be used right before you apply your finish. The theory is that it pre-fills the most absorbent areas giving you a more overall finish absorption across the surface. The truth is, I’ve had mixed results. In some cases they can be effective but they also suffer from the same problem as shellac where you can often end up with a stain color that’s lighter than desired.
The good news is, there’s a pre-conditioner that performs better than the ones mentioned above, doesn’t lighten the color too much, and you can make it in your own shop. I call it “Marc Juice”.
Years ago, I published an article called Blotch Control to Rule Them All featuring a dedicated blotch-control formula developed by another late and great woodworker, Charles Neil. His formula worked better than anything I tried at the time, but since his passing, the product is no longer available. So I decided to try to replicate the recipe and shared my results in this video:
5: Apply Oil Products in Thin Coats
If your finish of choice is an oil or an oil-based product, you’ll want to exercise restraint. So many people apply oil products by flooding the surface and that generally does three things: promotes curing issues, wastes finish, and intensifies blotch. There’s very little (if any) tangible benefit.
So whether you’re using pure tung oil, oil-based stain, Danish oil, an oil-varnish blend, or a hardwax oil, restraint is your friend. A little goes a long way. Most of these products can be applied in the same way:
- Apply a thin, even coat.
- Give the finish the recommended amount of time to penetrate.
- Wipe off all the excess.
And when I say wipe off the excess, I mean wipe it off. The surface shouldn’t remain wet, gummy, or covered in shiny puddles. Any finish sitting on top of the wood is a candidate for slow curing, uneven sheen, dust collection, and finishing misery.
Hardwax oils such as Natura OneCoat, Rubio Monocoat, Osmo Polyx-Oil, and similar products are especially sensitive to over-application. These finishes are designed to be spread very thinly. Using more product doesn’t give you more protection. It mostly gives you more product to remove. Here’s a video you might be interested in where I tested a bunch of different hardwax oil finishes:
The Most Important Step: Make Samples
Before finishing the actual project, reproduce your complete finishing schedule on scrap from the project. If you want to use shellac or a pre-conditioner, test different dilutions, coating times, and concentrations of ingredients if you’re making your own. Experiment with different sanding grits. Try different stains and finishes and in various combinations.
Ultimately, there’s no silver bullet for blotch control and getting good results truly comes down to experience, knowing how each wood responds to various products will give you a toolbox of solutions to just about any finishing problem you come across.
Want to Get More Comfortable With Finishing?
Finishing is one of the areas where woodworkers tend to have the least confidence, even though it makes the biggest visual difference in the final project. The Guild’s Simple Varnish Finish technique course covers surface preparation, wiping-varnish application, oil-varnish blends, pore filling, oily woods, rubbing out the finish, and other practical strategies for getting repeatable results.
You can also download my book, Finishing: It Ain’t Over Till It’s Over, for a no-nonsense breakdown of oil, varnish, shellac, application methods, common finishing mistakes, and how to fix them.
For even more finishing information backed by actual experience, browse the complete Wood Whisperer Finishing Archive.
Happy finishing!